

Photo by Mohammad Rahmani on Unsplash
Part 1: Laying the Groundwork for Serverless Email Registration with Azure and SendGrid


Serverless Architecture and Azure Functions
The emergence of serverless computing represents a significant development in cloud services, providing developers with a platform to construct and deploy applications without the complexities of managing servers. Azure Functions, a key feature of Microsoft's serverless solutions, embodies this transformation. It enables the development of compact, focused functions that react to specific events, scaling as needed and incurring costs only peruse. This shift in approach not only streamlines deployment but also enhances efficiency in resource use and cost management.
SendGrid's Role in Email Automation
Simultaneously, the domain of email communication has also experienced a notable change, partly due to services like SendGrid. As a cloud-based email delivery service, SendGrid enables efficient email automation, providing high deliverability rates and extensive analytics. Its seamless integration into various applications enhances the ability to send transactional and marketing emails, an essential component of modern digital communication strategies.
Purpose of the Automated Email Registration System
A system that utilizes Azure Functions and SendGrid to automate email registration is scheduled to be constructed by us. By employing the serverless architecture of Azure Functions and the robust email delivery features of SendGrid, we aim to simplify a user registration process with automated email responses. This method improves user interaction and brings greater efficiency and scalability to the registration workflow.
Prerequisites
Before we begin, you must be familiar with the following technologies and have them set up on your local machine to follow along with this guide effectively:
JavaScript Knowledge: A solid understanding of JavaScript is essential, as it is the primary language used in our serverless functions.
Node.js Experience: Familiarity with Node.js is crucial since our serverless functions will be built using this environment.
Microsoft Azure Account: Ensure you have an active account with Microsoft Azure. Specifically, you should activate Azure Functions within your account, which will be vital for deploying and managing our serverless functions.
SendGrid Account with API Access: A SendGrid account with API access is required for handling email operations. it will enable us to automate the email registration process.
Local Development Setup for Node.js: It's necessary to have a local development environment set up with Node.js. It will allow you to write and test functions before deploying them to Azure.
Step 1: Understanding the Application Flow
The core of our email registration system is found in its efficient application process, forming the central pillar of its operations.
User Registration Trigger: Initially, a user interacts with the system, typically through a registration form on a website or application.
Azure Functions Activation: This interaction activates an Azure Function, a serverless code designed for specific tasks.
SendGrid Integration: Upon activation, the Azure Function communicates with SendGrid, forwarding the necessary data to initiate an email response.
Email Dispatch: SendGrid processes this data and sends an automated email to the user, thus completing the registration loop.
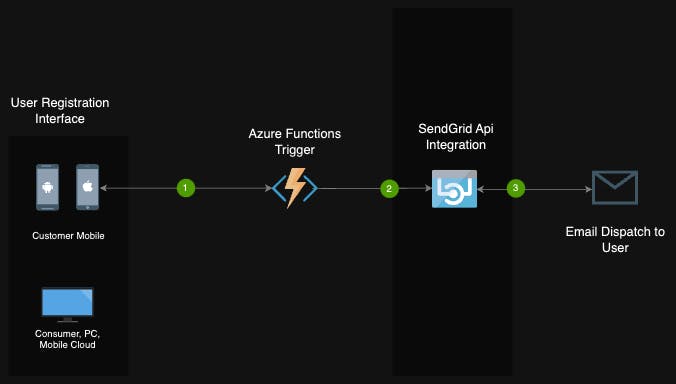
This flow represents a seamless integration of serverless computing and email automation, facilitating a responsive and efficient registration process.
Step 2: Setting Up Azure Functions
Establishing Azure Functions is essential in laying the groundwork for our email registration system.
Creating a Function App in Azure
Log into the Azure Portal:
Begin by accessing your Azure account. Navigate to create a resource.

Create a New Function app:
Choose the 'Function App' option and then click on 'Create'. to step up the necessary configuration
Note: This app will serve as a container for the individual functions that our system will use.
Configuring the Function App
- App Configuration:
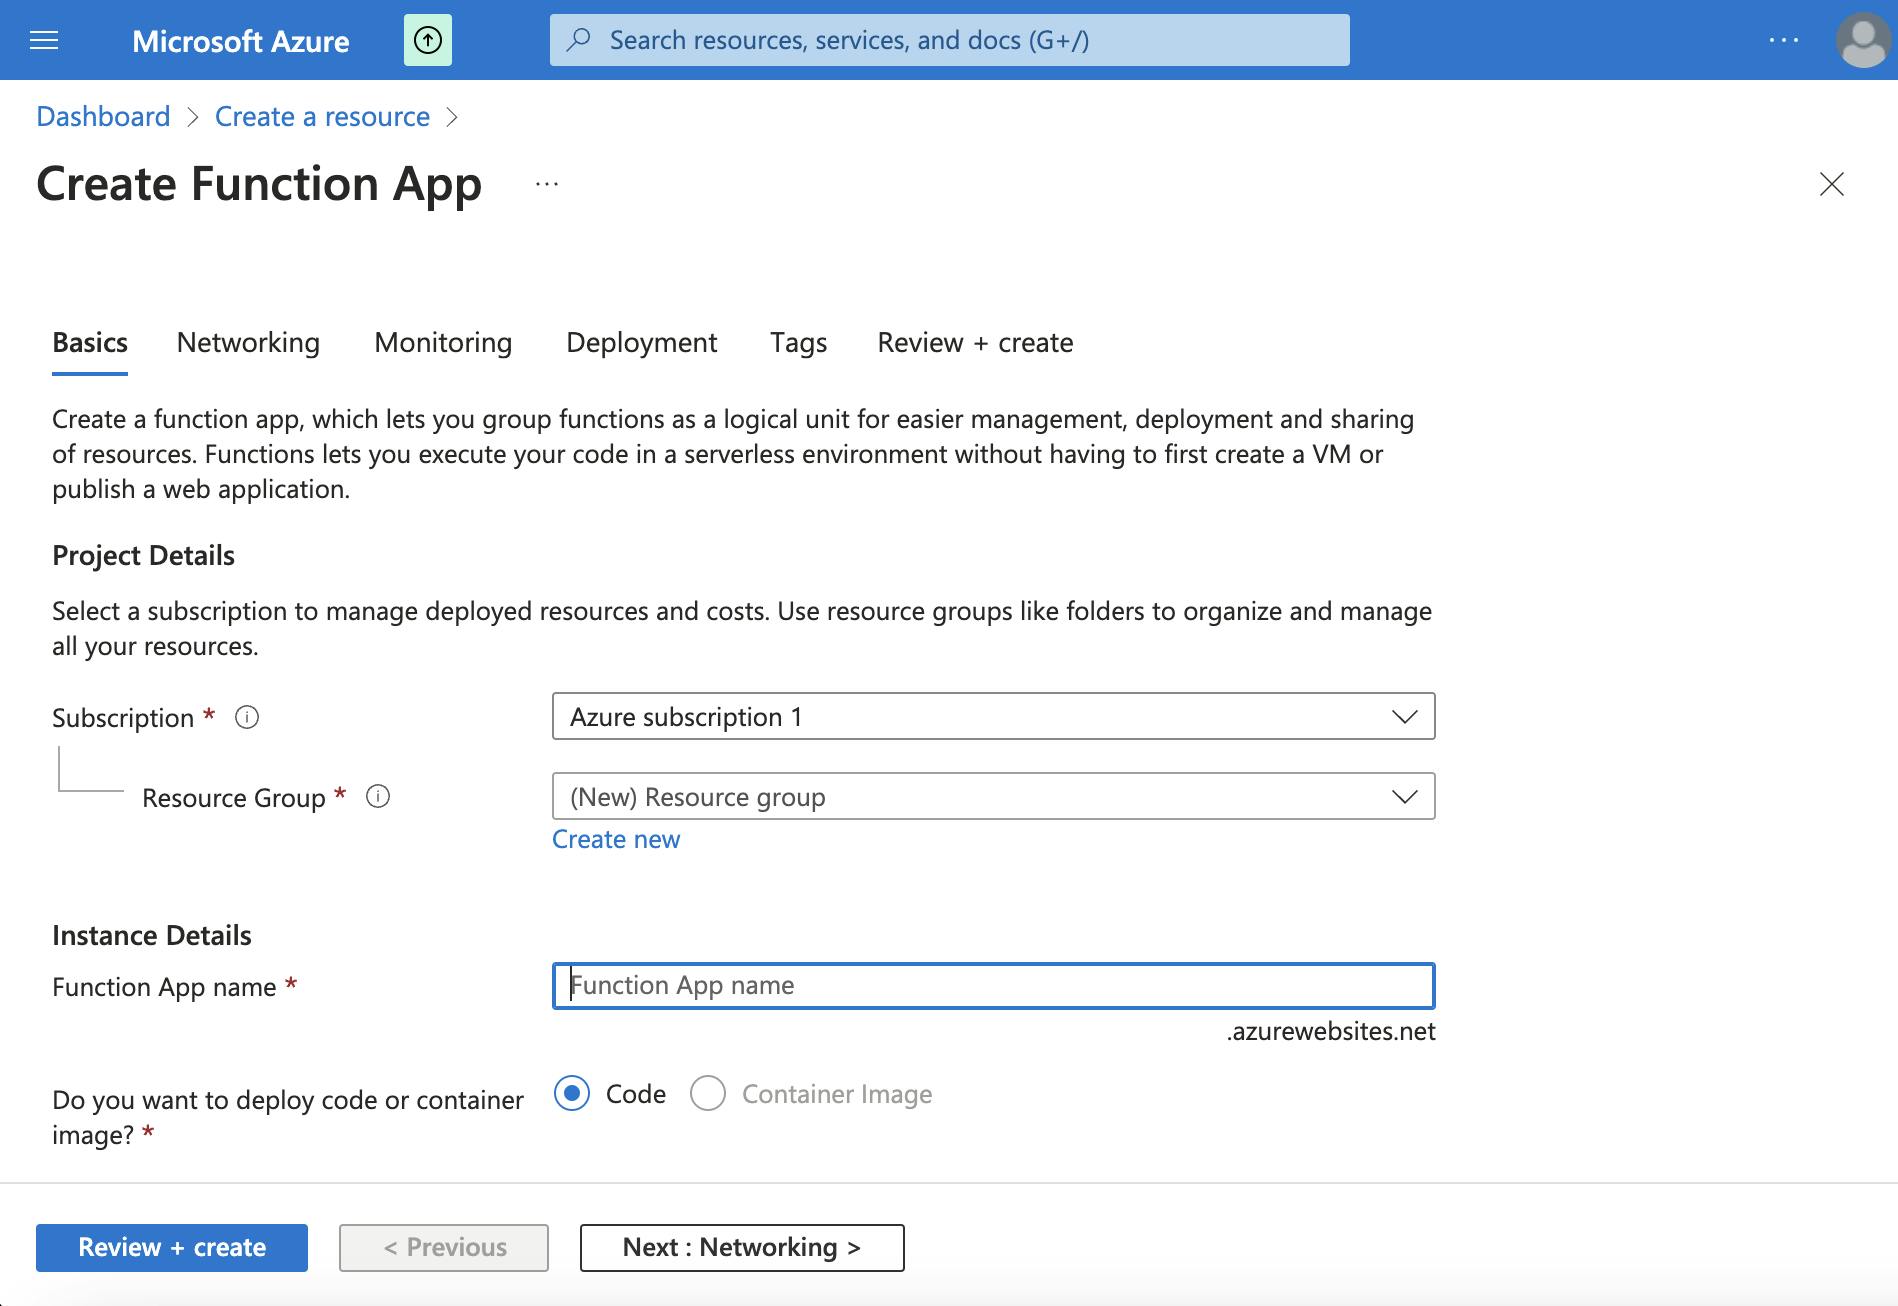
Fill in Essential Details: Configure your Azure Function App by entering the key details. These include:
Subscription: Select the Azure subscription you want to use.
Resource Group: Select an already established resource group or set up a new one.
Function App Name: Assign a unique name to your Function App.
Runtime Stack: Select the programming language (e.g., Node.js).
Version: Pick the specific version of the runtime stack.
Region: Choose the geographical location for your app.
Operating System: Select the operating system on which your app will run.
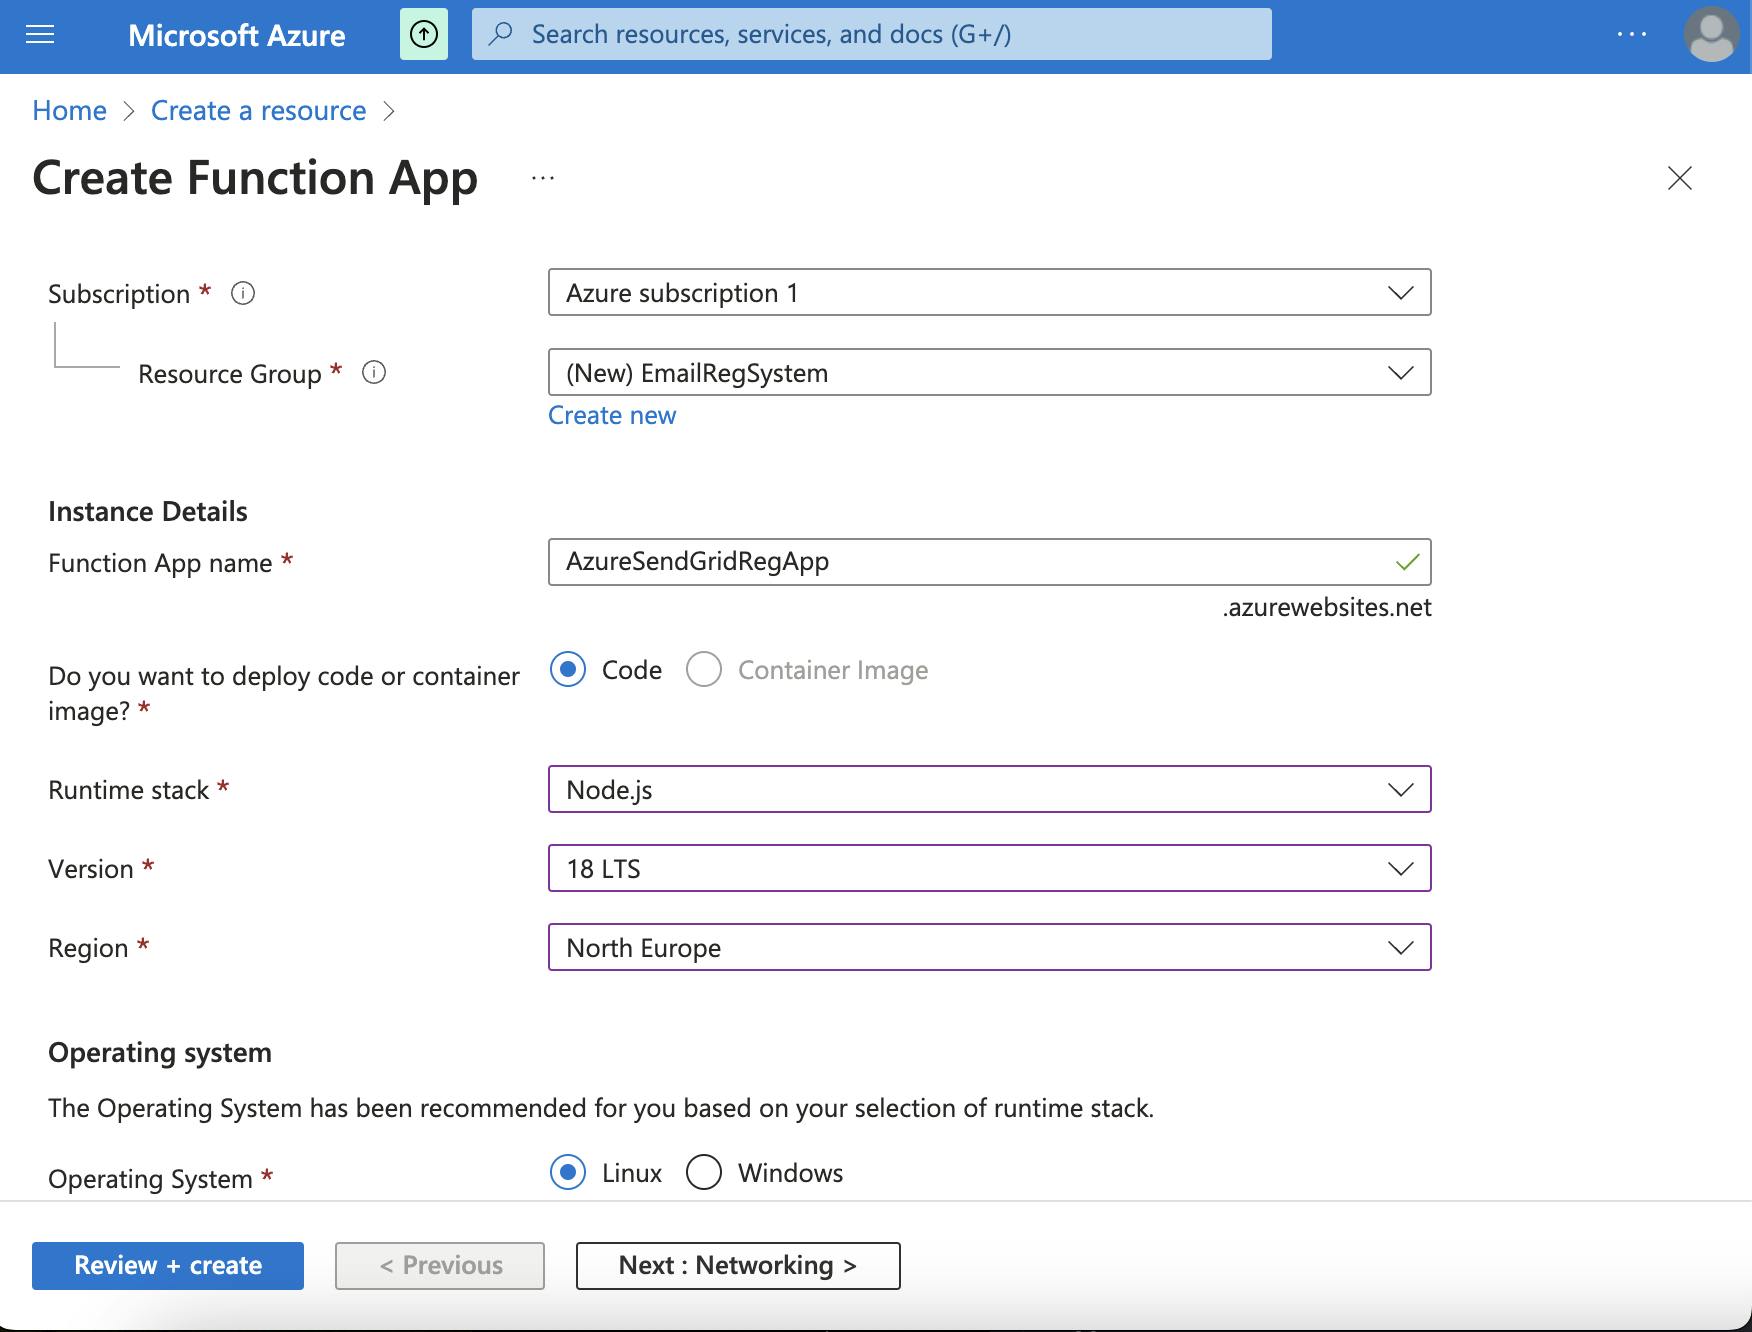
Default Settings: For all other options not mentioned above, retain their default settings. It ensures a standard setup without unnecessary changes.
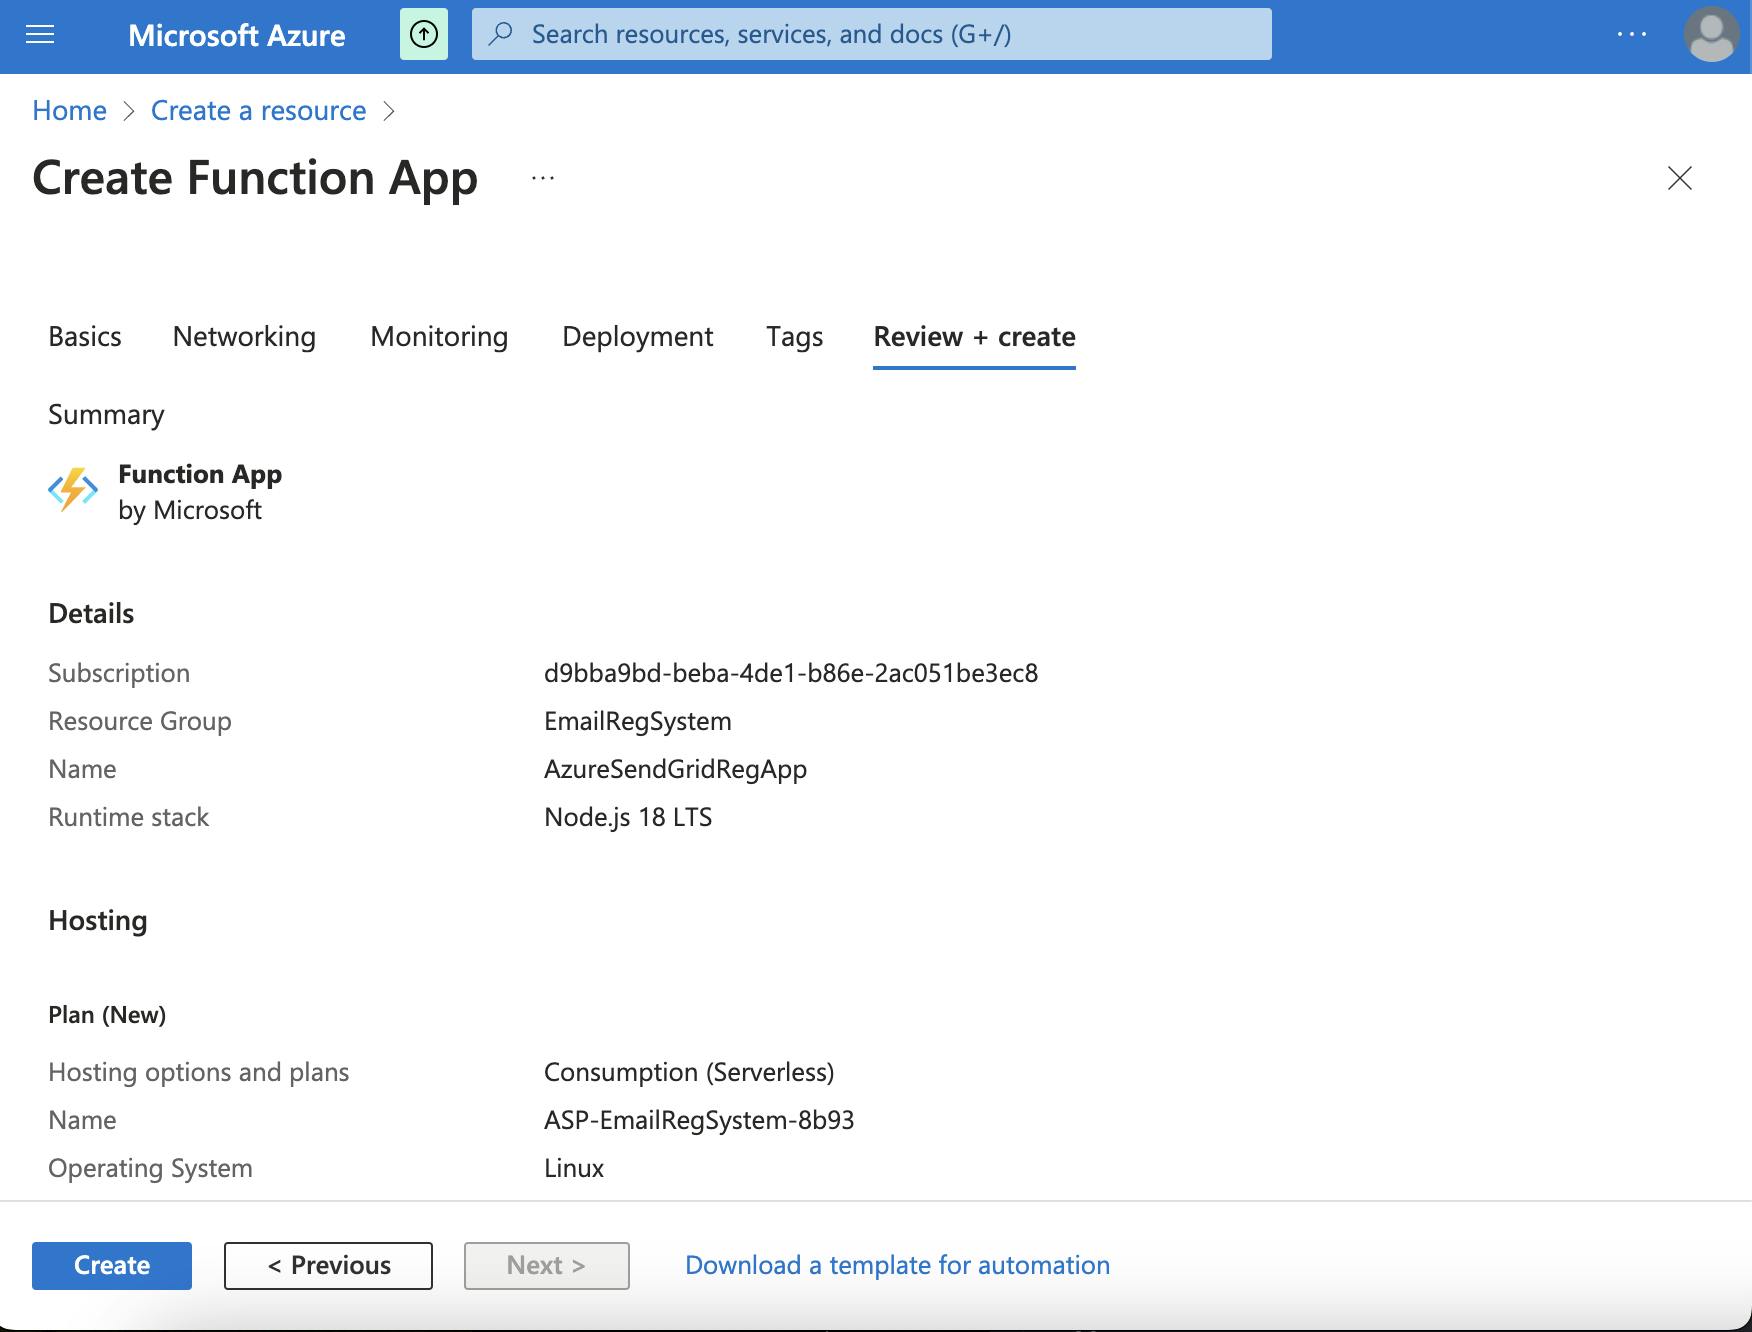
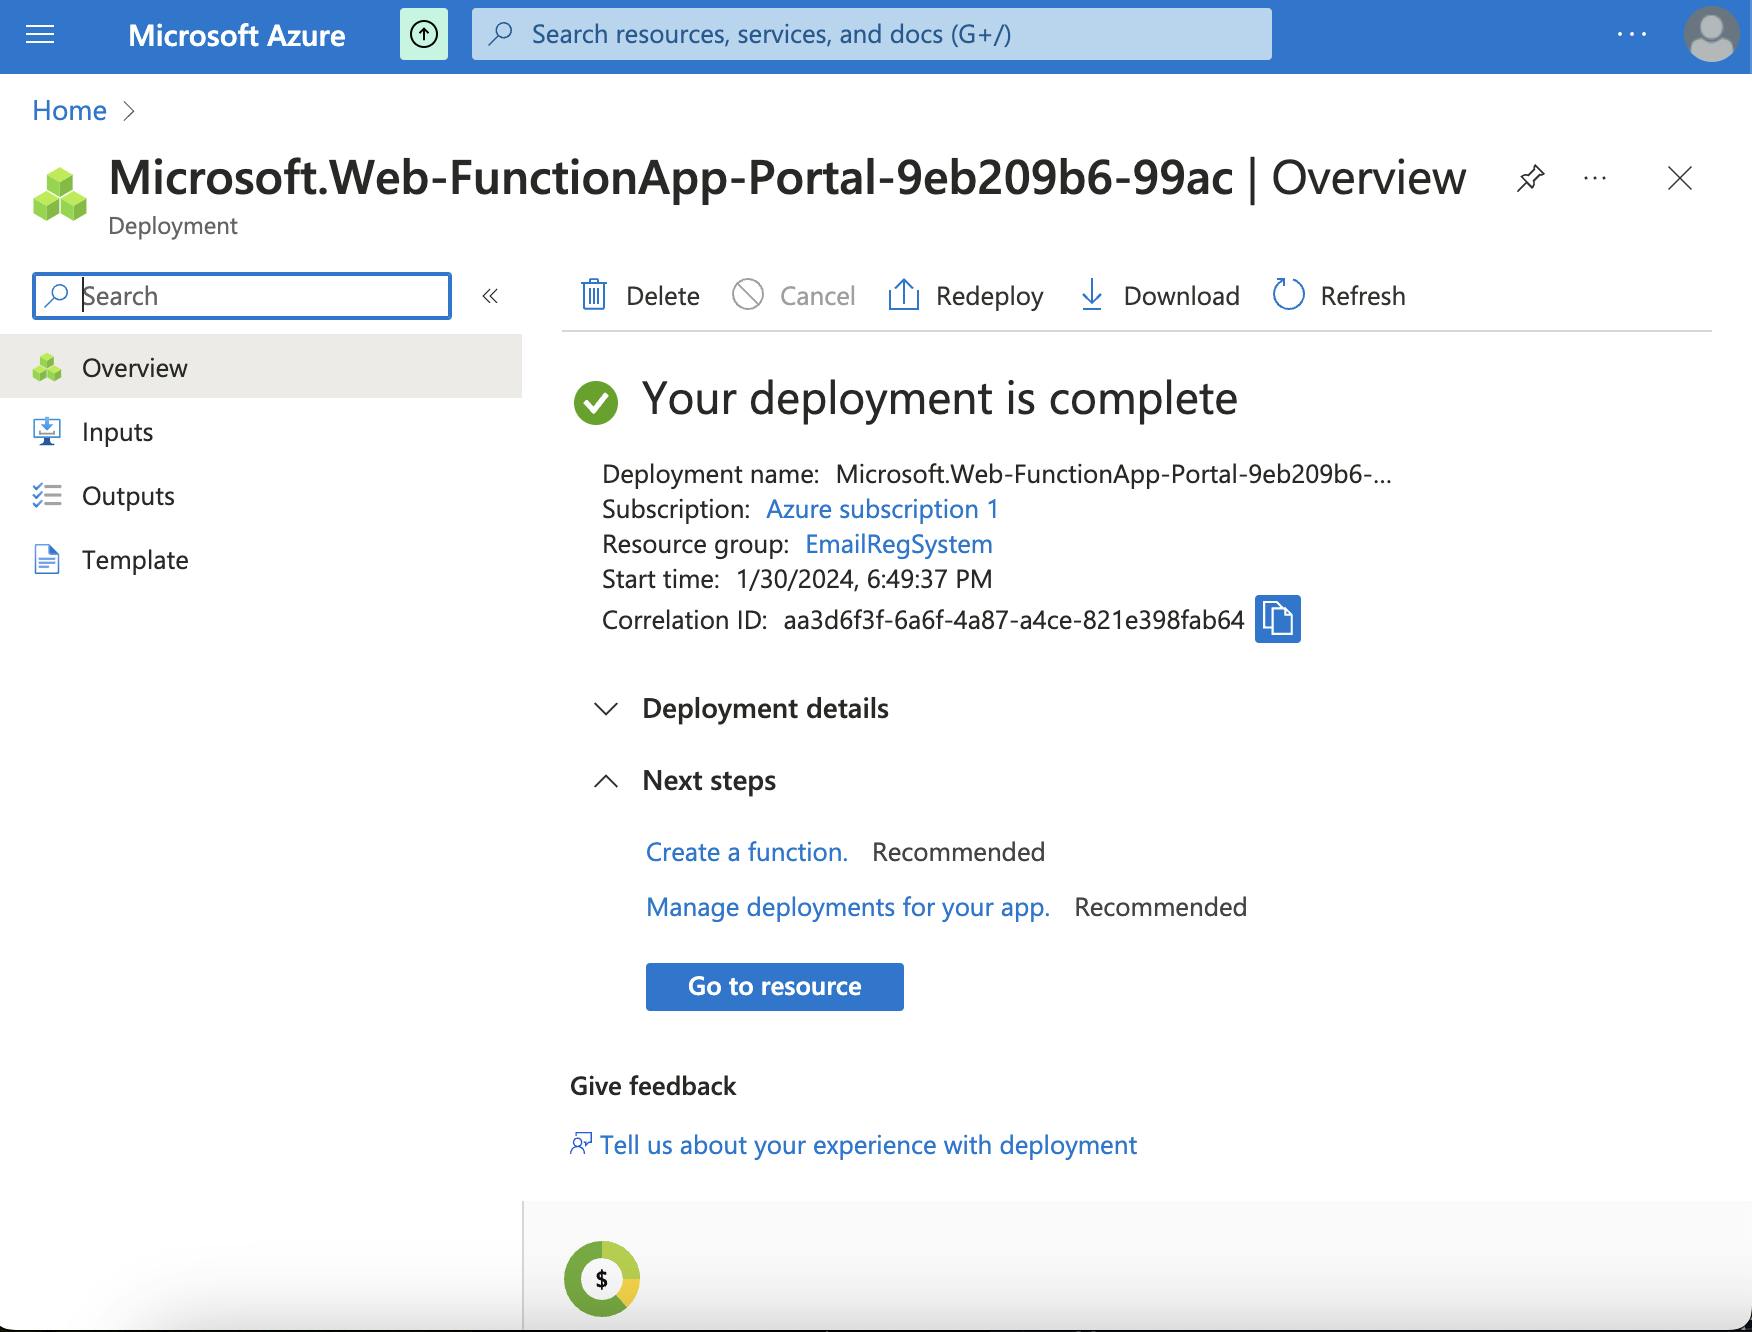
Review and Create: After filling in the necessary information, click the “Review + Create” button. This action will navigate you to a summary page where you can review your configurations.
Initialize the Node.js Project
Set Up Your Development Environment:
Open your preferred code editor or IDE, such as Visual Studio Code.
Create a new directory for your project in a suitable location on your computer. You can do this from your code editor or using the terminal with the command.
mkdir email-registration.Navigate into your new project directory using the terminal with
cd email-registration.
Initialize Your Node.js Project:
Run
npm init -yin the terminal while in your project directory. This command will create a new Node.js project and generate apackage.jsonfile with default values. This file is vital as it holds various metadata relevant to the project, such as dependencies, scripts, and version information.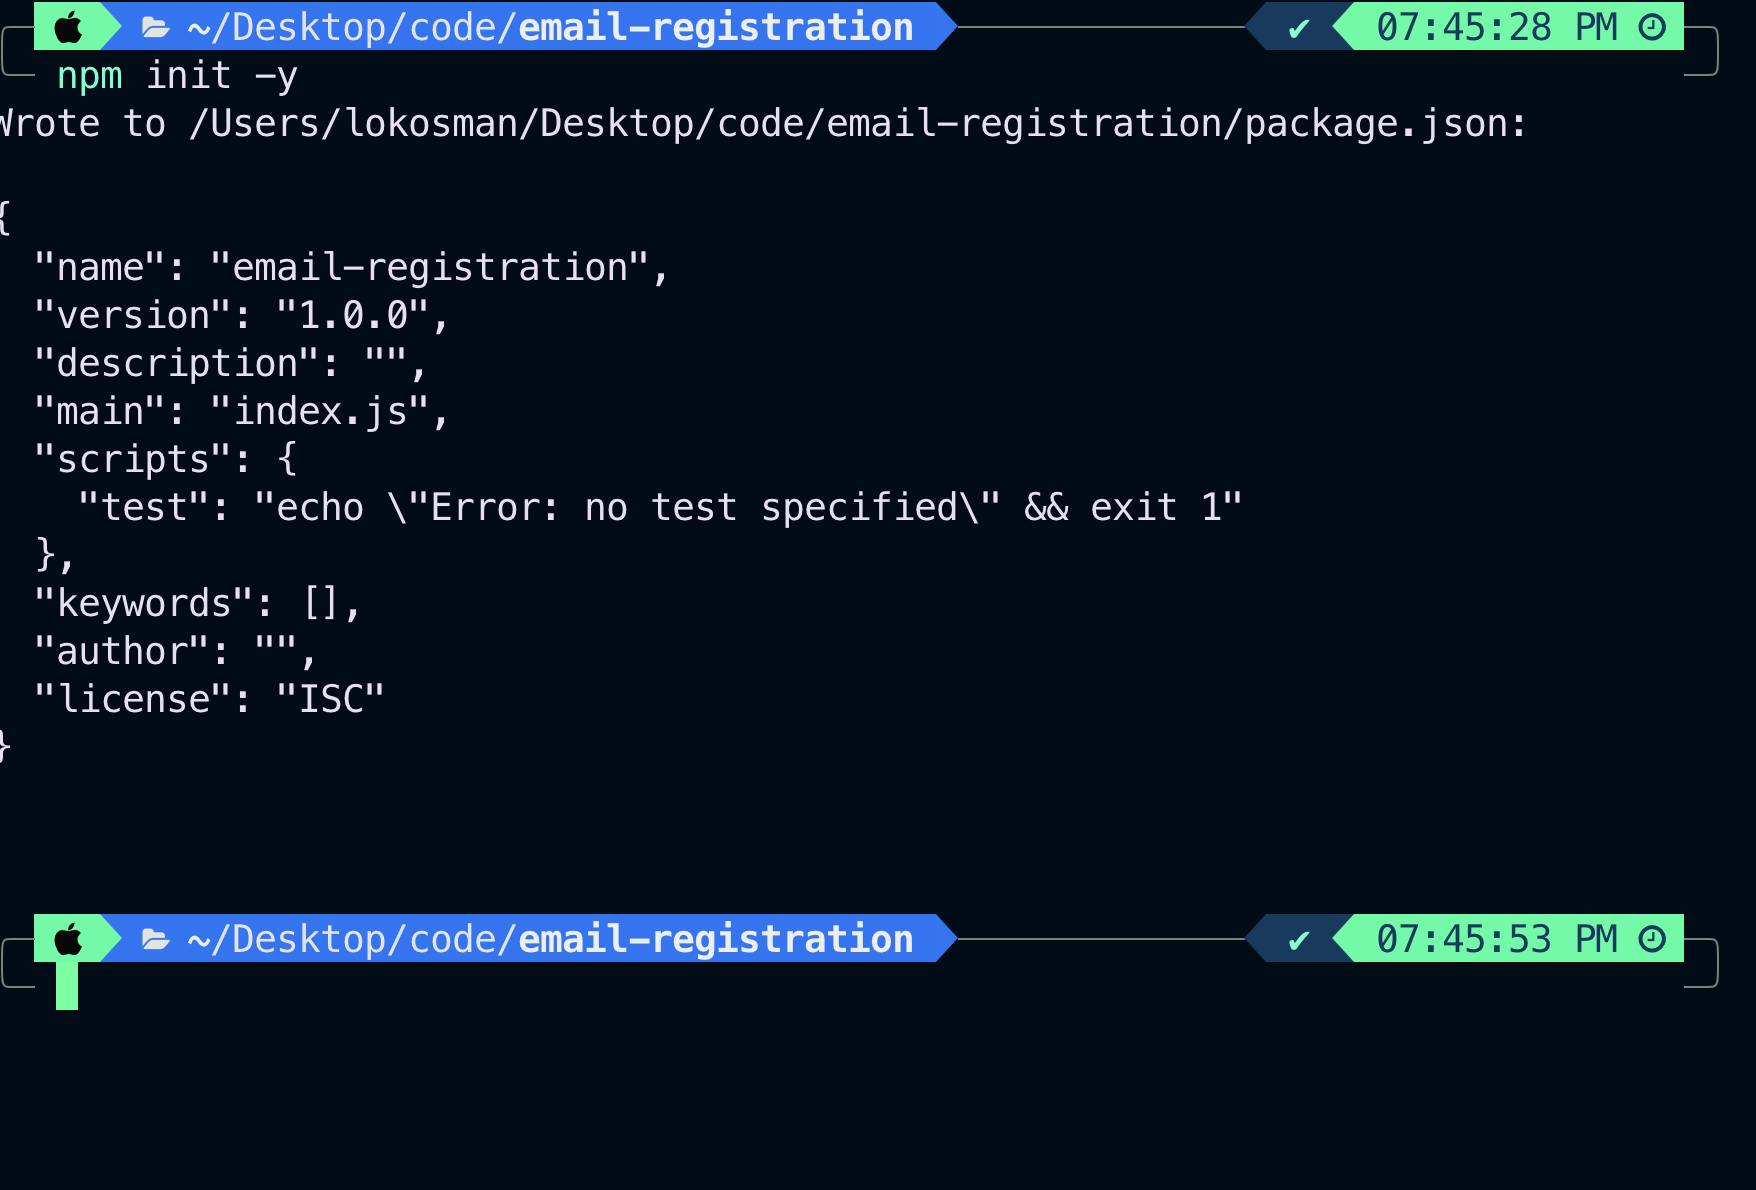
By following these steps, you have successfully set up your Node.js project and are ready to develop the core functionalities of your serverless email registration system. This groundwork is crucial for a smooth development experience as you integrate Azure Functions and SendGrid in the upcoming phases of your project.
Install Azure Functions Core Tools
On macOS
Install Using Homebrew:
Open your terminal and run the following commands to install the latest stable version of Azure Functions Core Tools.
  brew tap azure/functions
  brew install azure-functions-core-tools@4
Verify Installation:
- Confirm the installation by running
func --versionin the terminal. This should display the installed version of the Azure Functions Core Tools.
- Confirm the installation by running
On Windows
Option 1: Install with npm
Open Command Prompt or PowerShell and run the command below.
npm i -g azure-functions-core-tools@4 --unsafe-perm true
Option2: Install with Chocolatey
Launch Command Prompt or PowerShell with Administrator privileges and execute the following command.
choco install azure-functions-core-tools
Verify Installation:
Run
func --versionin Command Prompt or PowerShell.This should display the installed version of Azure Functions Core Tools.
Following these instructions, you can install Azure Functions Core Tools on either a MacBook M1 or a Windows machine, ensuring you have the necessary tools for local Azure Functions development.
Create and Develop Your Azure Function
Create an Azure Functions Project:
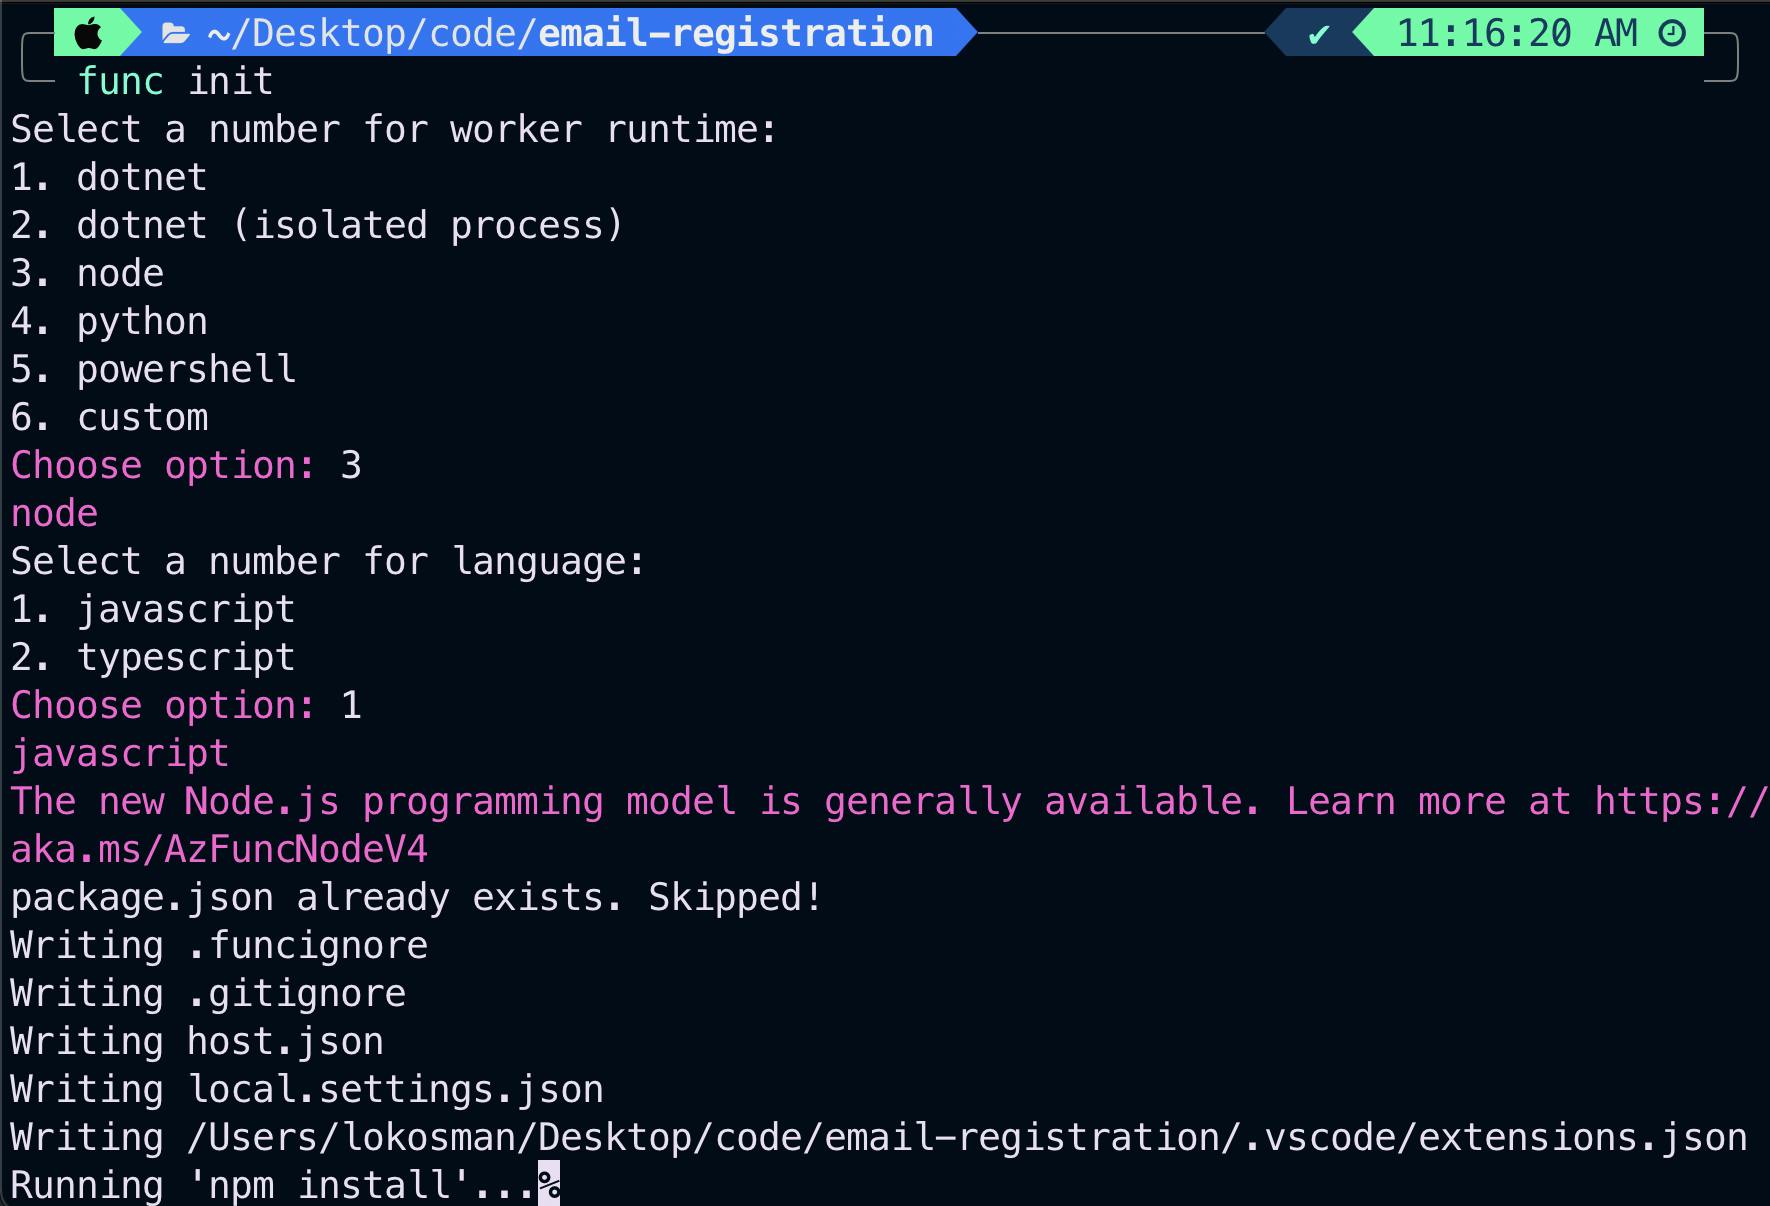
In your project directory, run
func initto initialize an Azure Functions project.When prompted, select Node.js as your language.
Add a New Function to Your Project:
Execute
func newto create a new function within your project.Choose the HTTP trigger template from the options provided.
Give your function any name of your choice, but we are using.
UserRegistrationFunction.

Develop Your Function Code:
Navigate to the newly created function's folder in your IDE.
Open the
index.jsfile (orindex.tsif you're using TypeScript).We are going to write our user registration logic in the index.js file. This typically involves parsing HTTP requests, processing registration data, and interacting with services like SendGrid.

By setting up Azure Functions correctly, we lay the groundwork for a robust, scalable, and responsive email registration system.
Conclusion
As we conclude the first part of our series, "Building an Automated Email Registration System with Azure Functions and SendGrid," we have successfully laid a solid foundation. This portion has introduced us to the innovative world of serverless computing using Azure Functions and highlighted the integral role of SendGrid in streamlining email automation.
We've covered all the prerequisites to ensure you can effectively follow this guide. These include a good grasp of JavaScript and Node.js and an active Azure account with Azure Functions enabled. Moreover, we've taken vital steps by setting up and configuring the Azure Function App. The initiation of our Node.js project and the installation of Azure Functions Core Tools mark significant milestones, setting us up for a smooth development process.
This preparatory phase is essential for advancing our project seamlessly. We're now set to proceed to the next critical stage, where we'll focus on the core of our system — crafting the user registration logic and integrating the robust email functionalities of SendGrid.
What to Expect in Part 2
In our upcoming article, we will go deeper into:
Configuring SendGrid: Detailed guidance on setting up your SendGrid account and securing API access for effective integration.
Developing the Registration Function: Step-by-step instructions on crafting the Azure Function to handle user registration.
Stay tuned for the informative steps in Part 2, where we'll bring our email registration system closer to fruition. The next part promises to deliver in-depth instructions and insights, preparing you to take the next exciting steps in this project.