How to Backup and Restore MongoDB Databases in Docker Containers

👋 Greetings, tech lovers! My expertise lies in Java backend engineering, focusing on refining microservices architecture. Web development, for me, is an endless expedition of discovery 🌌. When I share insights through my writings ✍️, it's a beacon of my passion. Each piece is a guiding lighthouse 🗼, hoping to enlighten your path and inspire your tech journey.
Introduction
Regular backups are critical to database management. They may be the one thing that protects a database from sudden failure, corruption, or destructive malevolent attacks. Keeping backups up-to-date will make it easy to restore good copies of your databases quickly and thus reduce losses and downtime.
This guide is your gateway to the world of backing up and restoring MongoDB databases using Docker. With Docker, you gain a convenient isolated environment to run your applications, including MongoDB. This setup simplifies the backup and restoration process and makes it highly reproducible.
We will do this using the following tools and several commands. mongodump is the utility of MongoDB used to create a database backup. mongorestore is a command-line utility that allows you to restore the contents of a binary dump into a MongoDB. Docker and Docker Compose Manage all your MongoDB instances and containers.
Prerequisites
Before you begin, make sure you have the following software and tools installed:
MongoDB: Installed locally.
Docker and Docker Compose: Installed and configured.
MongoDB Database Tools: Including
mongodumpandmongorestore.
Step-by-Step Guide
Dump Database
The utility of
mongodumpfrom MongoDB will help create a binary backup or dump of the database. This backup can be restored to return the database to its status at backup time. You needmongodumpto get a complete and valid state of your data in your database, you can restore it if data loss or corruption occurs.Command:
mongodump --uri 'mongodb://localhost:27017' --archive=/path/to/your/backup/houseFinderDB.archive --gzip --db houseFinderDBExplanation:
mongodump --uri:mongodumpcommand initiates the backup process. The--urioption specifies the connection string to the MongoDB instance.'mongodb://localhost:27017': This will connect to thelocalhostserver, where MongoDB is running already at the port.--archive=/path/to/your/backup/houseFinderDB.archive: Dumps the backup as an archive to your preferred location.--gzip: compress the backup file.--db houseFinderDB: Represents that the name of the database being backed up ishouseFinderDB.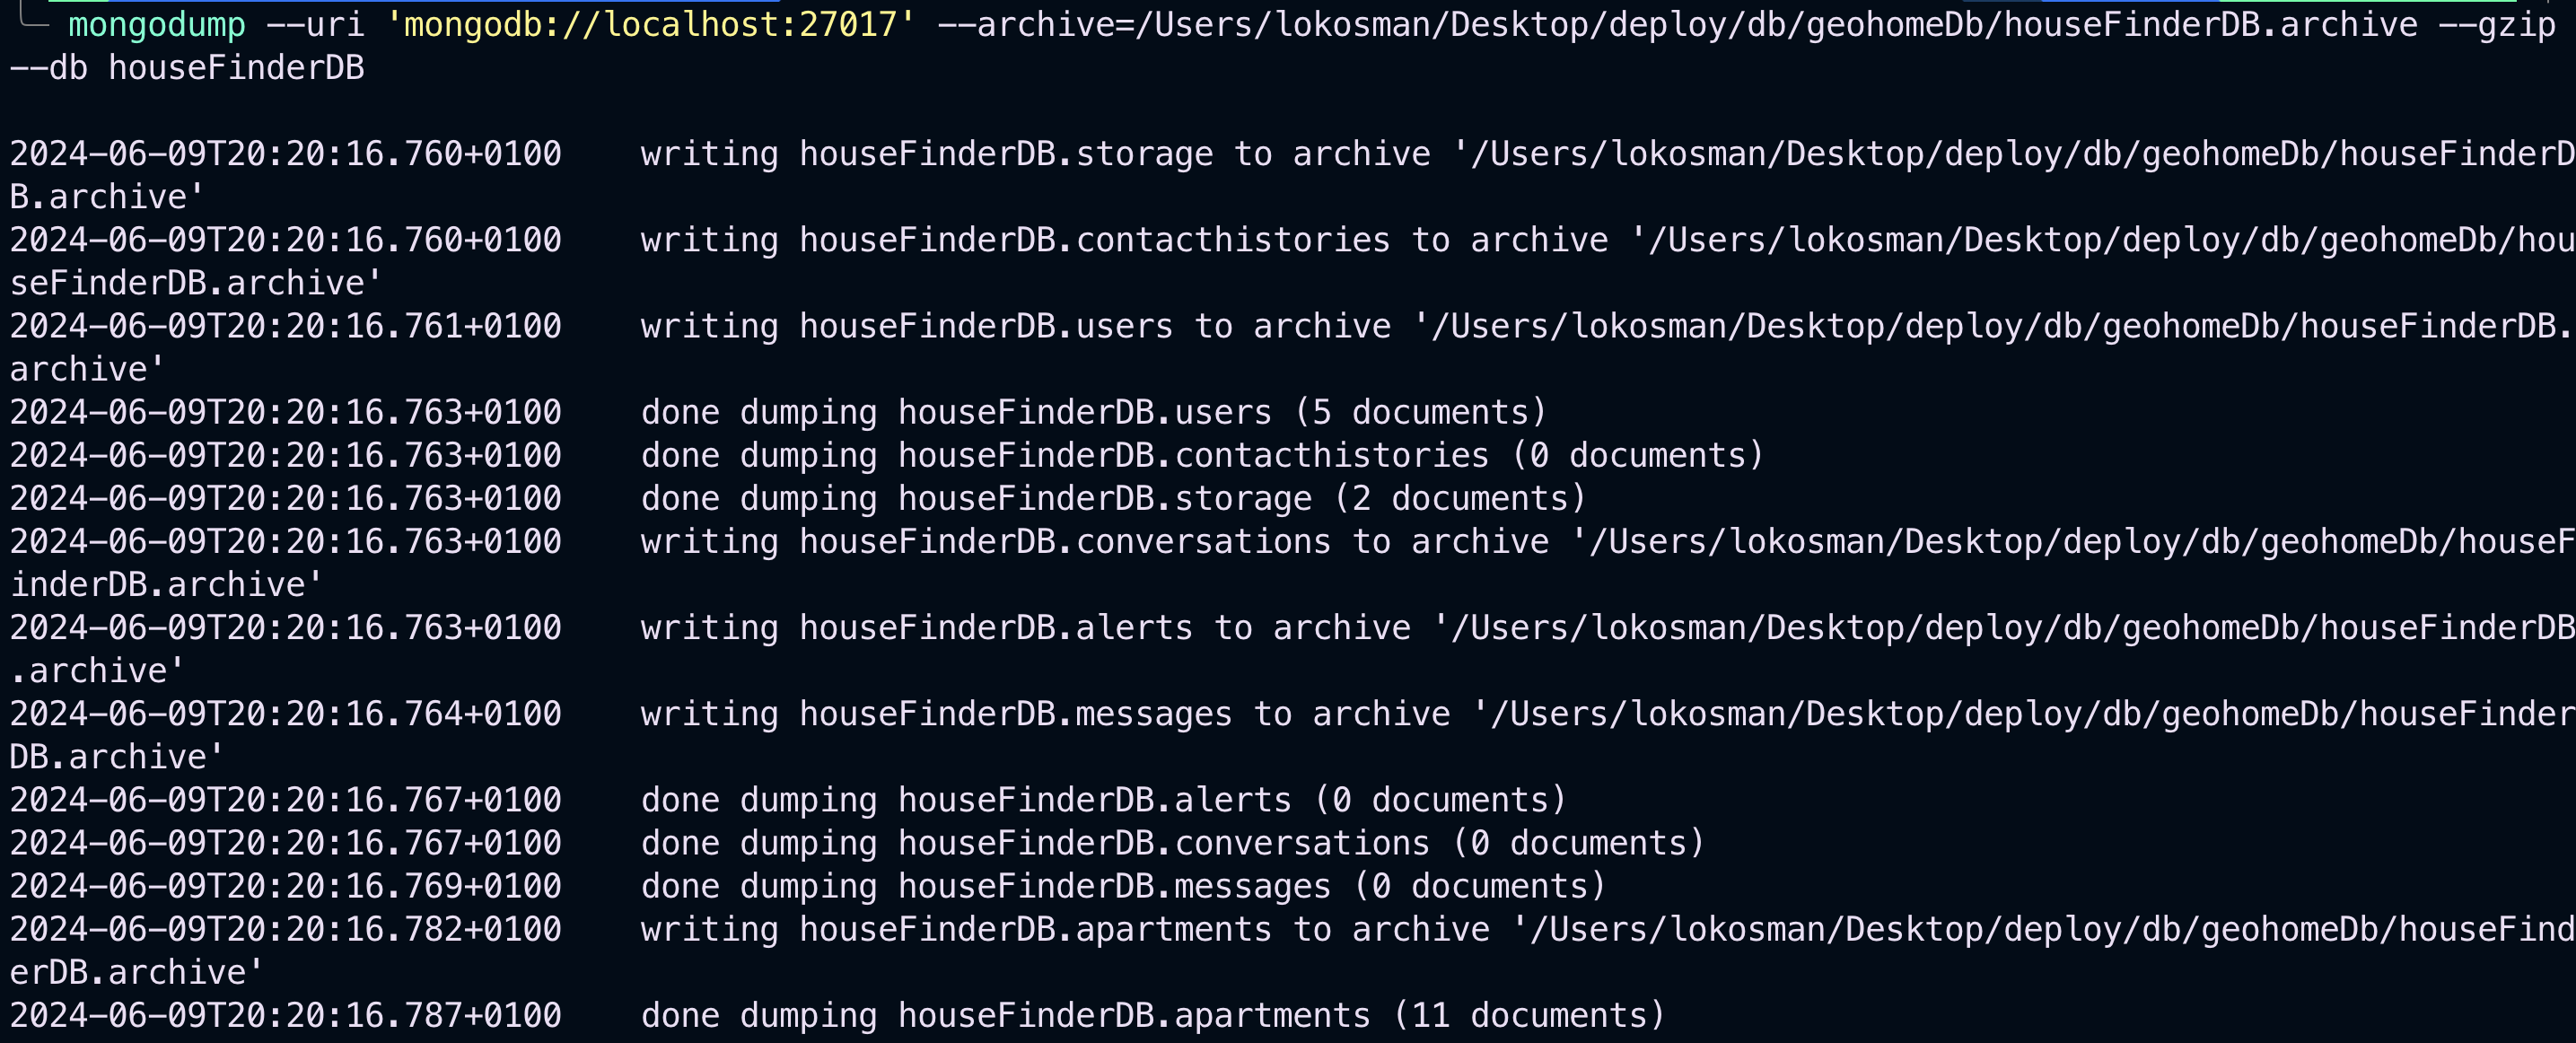
Verify the Dump File (Optional)
Verifying the dump file's contents ensures the backup process succeeds and the archive contains the expected data.
Command:
mongodump --archive=/path/to/your/backup/houseFinderDB.archive --gzip --verboseExplanation:
mongodump: Command to create a backup of your MongoDB database.--archive=/path/to/your/backup/houseFinderDB.archive: Specifies the path to the archive file where the dump will be stored.--gzip: indicates that the archive file should be gzip-compressed.--verbose: Provides detailed output about the dump process, including the collections and documents being backed up.
Ensure Docker Containers are Running
Make sure your Docker containers are running before anything else. It is essential because the database will restored inside the MongoDB container.
Command:
docker-compose up -dExplanation:
docker-compose up -d: This command starts all services defined in adocker-compose.ymlfile while ensuring that a Docker container of MongoDB is running.
Copy the Dump File to the MongoDB Container
Now that your Docker container is running, it's time to copy the backup file into the MongoDB container within Docker. This action is necessary as you restored the files using the
mongorestorecommand within the container.Command:
docker cp /path/to/your/backup/houseFinderDB.archive <container_name>:/houseFinderDB.archiveExplanation:
docker cp: This command is used to copy files and folders between the container and the local filesystem./path/to/your/backup/houseFinderDB.archive: Will define the path to your archive file on your local machine.<container_name>:/houseFinderDB.archive: Tells MongoDB container its destination path.
Run the Restore Command Inside the MongoDB Container
The
mongorestorecommand restores the backup file, so it must be run inside the MongoDB container with the proper authentication details and an appropriate path to the archive file.Command:
docker exec -it <container_name> mongorestore --username root --password example --authenticationDatabase admin --archive=/houseFinderDB.archive --gzipExplanation:
docker exec -it: Run a command in a running container. The-itoptions make the session interactive.<container_name>: Defines the name of the MongoDB container within docker.mongorestore: Command to restore a database.--username root: The authentication username.--password example: Indicate password for authentication.--authenticationDatabase admin: The database where the user's authentication credentials will be--archive=/houseFinderDB.archive: It is the archive path in the container.--gzip: Indicates the archive file is in gzip format.
Verify the Restoration
After restoring the database, verifying that the restoration was successful and that the data is intact is essential.
Command to Connect
docker exec -it <container_name> mongosh --username root --password example --authenticationDatabase adminExplanation:
docker exec -it: Run a command in a running container. The-itoptions make the session interactive.<container_name>: Defines the name of the MongoDB container within docker.mongosh: MongoDB shell command to interact with the database.--username root: The authentication username.--password example: Indicate password for authentication.--authenticationDatabase admin: Specifies the database against which to authenticate.
Commands to Verify:
    use houseFinderDB
    show collections
    db.apartments.find().pretty()
    db.users.find().pretty()
Explanation:
use houseFinderDB: Switches tohouseFinderDBdatabase.show collections: Lists all tables in the current database.db.apartments.find().pretty(): Displays documents in theapartmentscollection in a readable format.db.users.find().pretty(): Displays documents in theuserscollection in a readable format.
Summary of Commands
For quick reference, here is a summary of the commands used in the backup and restore process
Dump the Database:
mongodump --uri 'mongodb://localhost:27017' --archive=/path/to/your/backup/houseFinderDB.archive --gzip --db houseFinderDBVerify the Dump File (Optional):
mongodump --archive=/path/to/your/backup/houseFinderDB.archive --gzip --verboseEnsure Docker Containers are Running:
docker-compose up -dCopy the Dump File to the MongoDB Container:
docker cp /path/to/your/backup/houseFinderDB.archive <container_name>:/houseFinderDB.archiveRun the Restore Command Inside the MongoDB Container:
docker exec -it <container_name> mongorestore --username root --password example --authenticationDatabase admin --archive=/houseFinderDB.archive --gzipVerify the Restoration:
docker exec -it <container_name> mongosh --username root --password example --authenticationDatabase admin
Conclusion
Backing up and restoring MongoDB databases in Docker containers is a straightforward process that involves several key steps: dumping the database, ensuring your Docker containers are running, copying the dump file to the container, restoring the database inside the container, and verifying the restoration. Regular backups and restorations are vital to maintaining data integrity and availability. Apply this process to your projects to safeguard your data effectively.


